

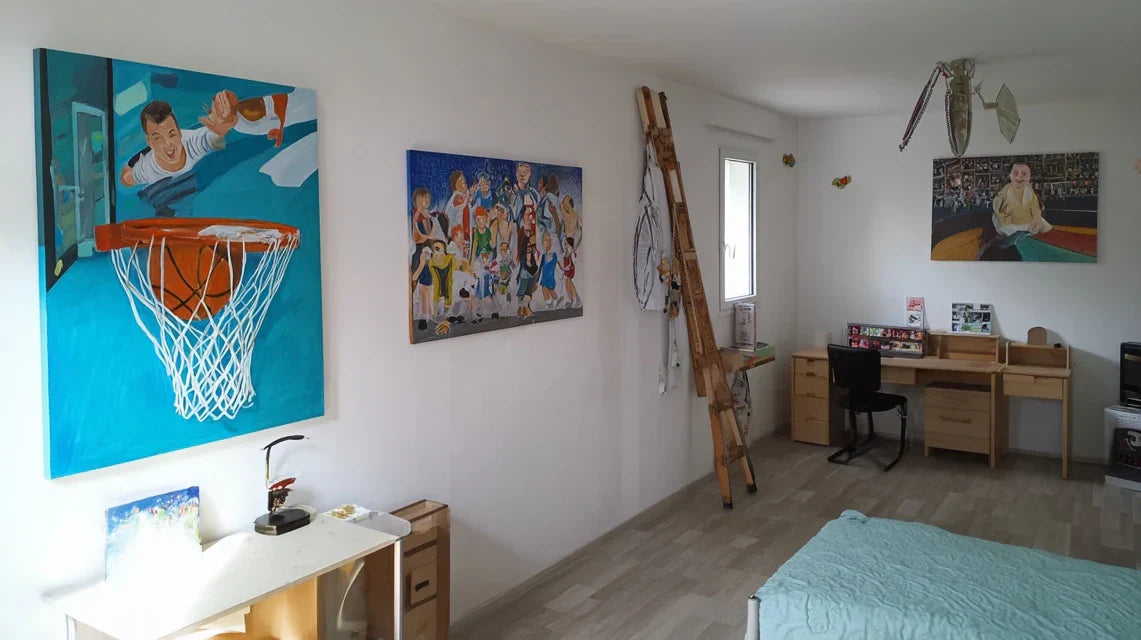
Looking at your child's room, you feel that familiar frustration: the colorful cartoon drawings that once adorned their walls suddenly seem too childish for this little being who is growing up so fast.
Posters of their childhood heroes begin to clash with their emerging personality, but you dread making a complete change and losing the warm atmosphere you worked so hard to create.
You may have already tried making some changes by removing certain items, but the result was disappointing: empty and cold walls that no longer reflected your child's soul.
It’s perfectly normal to feel lost during this transition. The problem isn't your taste or your previous choices, but the lack of a gradual approach that respects the natural evolution of the child.
By the end of this article, you will master the art of harmoniously evolving your child's wall decor, creating gentle transitions that preserve their memories while accompanying their growth with style and elegance.
Why transitioning your child’s décor can’t wait?
Each month that passes without adaptation widens the gap between your child's identity and their environment. Imagine wearing the same clothes for years: that's exactly what your child feels with a décor frozen in time. The longer you wait, the more brutal and costly the break will be.
🏠 Testimonial from a mom: "My 9-year-old daughter refused to invite her friends over because of her 'baby drawings'. I realized that her room no longer reflected who she had become: a little artist passionate about nature and travel.”
💬 Conversation with a décor expert
The golden rule of a successful transition: preserve 30% of familiar elements while introducing 70% of adapted novelties. This magical proportion maintains the feeling of security while stimulating pride in growing up, with visible results from the first week.
What's Really Going On in Your Child’s Head
Your child may be exhibiting these revealing signals: they decorate their school desk differently than their bedroom, hide certain decorative items when they have friends over, or express artistic tastes totally different during your cultural outings.
This disconnect isn't rebellion, but the natural sign of a personality asserting itself. Their current environment simply doesn’t allow them to fully express themselves anymore. It's a disguised cry for help.
Imagine having to live in a house decorated according to your parents' tastes: you would feel stifled, not really at home. Your child lives that every day.
The First Hidden Cause: The Trap of Parental Nostalgia
Contrary to what one might think, it's not children who are most attached to old decorations, but parents projecting their own nostalgia. We confuse preserving memories and keeping objects.
It’s like keeping all of a baby’s clothes in an adolescent’s closet: the emotion is in our hearts, not in the objects. Your child needs you to accept that they are growing up.
This unconscious resistance hinders their identity development and can create family tensions. Accepting the transition means giving them permission to evolve with your blessing.
🔍 Revealing test: Ask your child to show you 3 images they would like to have in their room. If they have nothing to do with their current decor, that's a sign that the transition is urgent!
The Second Cause: The Illusion of
-
Your child subtly customizes their space: They stick images in hidden places or decorate their desk differently from their bedroom
-
They avoid having friends over at home: A sign that their current decor no longer reflects the image they want to project
-
Their tastes are expressed elsewhere: Their clothing, accessory, or activity choices contrast totally with their decor
The trigger factor: ages of major transitions
Certain ages are pivotal moments: 6-7 years old (starting school), 10-11 years old (pre-adolescence), 14-15 years old (identity affirmation). These periods naturally trigger a need for environmental renewal. Recognizing these moments allows you to anticipate and serenely accompany changes rather than suffer them in haste and frustration.
The 18-month rule: If your child's decor hasn't evolved in 18 months, a transition is necessary. You can check this by seeing if they are exhibiting new interests that aren't reflected in their environment.
| ❌ Common belief | ✅ Reality | 💡 Explanation | 🎯 Practical benefit |
|---|---|---|---|
| It needs to be changed all at once | A gradual transition is gentler | Gradual adaptation respects emotional anchors | Less stress and financial cost |
| Neutral decor lasts longer | A modular base adapts better | Artistic elements evolve easily | Constant creative renewal |
| Your child will damage "serious" art | Quality art teaches respect | Beautiful objects develop care | Natural aesthetic education |
| It's too complicated to organize | A simple method exists | 3 progressive steps are enough | Successful transformation guaranteed |
The 3 bridges method: transform gently
Rest assured: this transformation requires neither revolution nor a colossal budget. Like an architect who connects two shores with successive bridges, we will create three harmonious transitions between your child's current and future universe. Each step brings its own satisfaction while naturally preparing the next.
🌉 Overview of the transformation: First bridge: selective preservation (keeping foundational elements), Second bridge: artistic introduction (integrating new tastes), Third bridge: final harmonization (creating mature coherence). Each bridge strengthens your child's confidence and pride in living in a space that resembles them.
First bridge: preserve the essential emotional connection
This step lays the foundation for your child’s trust in the process. Like a tree that keeps its roots while renewing its leaves, we identify what absolutely must remain to maintain a sense of security. Your child will feel reassured to see that their most cherished landmarks are respected.
What you need for this step
- A camera or smartphone: To document the existing elements before transformation, create a "memory album" with your child and be able to go back if needed. Prioritize good image quality so that memories are beautiful. Avoid doing this “in your head” as emotion distorts perception.
- Colorful masking tape: To temporarily delineate areas to preserve, modify or transform without damaging the walls. Choose one that is easily repositionable and in different colors for each category. This concrete visualization helps the child understand the project.
- A shared notebook: To note with your child their emotions towards each element and together create the "design brief" for their new decor. This collaboration strengthens their involvement and avoids regrets after transformation.
Now, let's move on to practice with your child
Realize the emotional inventory together
Walk around the room with your child: Ask them to rate each decorative item on a scale of 1 to 5, explaining why. This method reveals their true emotional connections beyond your parental assumptions. Also note your own emotions to identify your projections.
⏱️ Time: 30 minutes | ✅ Successful when: Each element has a clear rating and an explanation | ⚠️ Attention: Do not influence their answers by showing your adult preferences
Categorize according to the rule of 3 colors: Use green masking tape for "keep absolutely", orange for "maybe transform", red for “ready to go”. This colored visualization helps the child concretely project themselves into changes without anxiety.
⏱️ Time: 20 minutes | ✅ Successful when: Each area has its color and the child explains their choices | ⚠️ Attention: Resist the urge to "correct" their decisions to respect their autonomy
Create the memory album: Photograph together the items that are going away, creating a staged scene with your child in it. This ritual turns separation into a celebration of memories and avoids a sudden feeling of loss.
⏱️ Time: 15 minutes | ✅ Successful when: The child smiles while looking at the photos | ⚠️ Attention: Do not rush this step as it conditions acceptance of change
✅ Success check: Your child should be able to clearly explain why each item stays or goes, show excitement about the photo album, and trust you for the next steps. If they seem anxious, reassure them by showing that their "green treasures" are not moving.
This is the most rewarding step: the one where your child discovers that they can express their emerging personality through art. This phase develops their sense of aesthetics while respecting their preserved references. The snowball effect is magical: they begin to see all their room with a new eye.
Choose together the first signature artwork: Select with your child a piece of art that perfectly represents their new personality, something that makes them smile instantly. This "flagship" work will set the tone for the entire transformation and serve as a reference for subsequent choices.
⏱️ Time: 45 minutes of browsing | ✅ Success when: The child has an obvious "favorite" | ⚠️ Attention: Don't rush into the first choice, let the decision mature
Install the first "gallery corner": Create a dedicated exhibition space in the most visible area of the room, with careful lighting and mounting. This professional staging immediately transforms the perception of space and enhances the child's tastes.
⏱️ Time: 1 hour | ✅ Success when: The artwork naturally attracts the eye upon entering | ⚠️ Attention: Carefully consider lighting as it completely transforms the visual impact
This final step reveals the true creator that your child carries within them. It's no longer just about decorating, but composing a coherent environment that tells their story. Your child becomes the director of their own universe, a skill they will keep for life.
Creating overall harmony
Establish the master palette: Identify with your child the 3-4 dominant colors that will create visual unity between old and new. This palette will guide all future additions and avoids the anarchic "patchwork" effect of classic children's rooms.
⏱️ Time : 30 minutes | ✅ Successful when: An obvious color harmony emerges | ⚠️ Attention: Avoid more than 4 colors to maintain sophistication
Compose the complete evolving gallery: Arrange 3-5 artworks according to the rules of wall composition (varying heights, breathing space between pieces, visual dialogue). This step develops your child's artistic eye and creates a true "personal museum".
⏱️ Time : 1h30 | ✅ Successful when: The whole thing works visually | ⚠️ Attention: Allow for free spaces for future acquisitions
The progression rule of the 3 bridges: Move on to the next bridge only when your child spontaneously expresses satisfaction with the previous bridge and starts to have ideas for the next. The patience of the first steps guarantees the enthusiasm of the following ones.
Pro secrets for a perfect transition
You now master the basics, but some expert subtleties will transform your success into a true masterpiece. These tips from professional youth decor experts make the difference between a room that "is fine" and a space that really reveals your child's personality.
🎨 Expert tip level advanced: Create an "emotional red thread" that runs through the entire decor: a color, a shape, or a subtle theme that unifies all elements without standardizing them. For example, the spiral found in a shell, a galaxy and an abstract artwork creates an unconscious sophistication that fascinates visitors.
💭 Frequent parent question
"How can I be sure my child won't quickly get tired of their new artistic choices?"
This concern is totally understandable and reveals your attention to their well-being! In reality, quality art grows with the person who contemplates it: your child will discover new details over the years. A good painting reveals different facets depending on age and mood, like a friend who always surprises us. Furthermore, the modular system that we install allows adjustments without doing everything again.
🔄 Reassuring tip: Suggest moving a piece after a month: if they prefer to put it back in the same place, it means it has found its definitive place in their heart!
The 5 mistakes to absolutely avoid
Before you start, I want to protect you from common errors that even the most attentive parents make. These pitfalls are tempting because they seem logical, but they often sabotage transitions that could have been perfect.
- ⚠️ Wanting to coordinate everything perfectly: The temptation to create a "too polished" set kills the child's personality and gives it an artificial look. A little "delicious organized mess" better reflects a child's soul. Leave 20% voluntary imperfection to preserve authenticity. ⚠️ Choosing for the child “to go faster”: This timing error ruins the entire appropriation process. Even if their tastes surprise you, respecting their choices develops their confidence and their attachment to the result. Prefer taking more time than taking control. ⚠️ Installing everything at once: Excitement often leads to hanging everything at once, but the child needs time to “digest” each novelty. A gradual installation allows emotional appropriation and avoids visual saturation. ⚠️ Neglecting the lighting of artworks: Many underestimate this technical detail, yet bad lighting can kill even the most beautiful artwork. Harsh or weak white light instantly devalues art and disappoints the child. Invest in quality lighting. ⚠️ Forgetting to anticipate future evolution: Focusing only on the immediate creates blockages for the next steps. Always keep 30% free space and evolving hanging systems to accompany future growth without having to start all over again.
🔍 Safety checklist before finalization: The child can explain why they like each choice, the set remains harmonious even when viewed from the door, free spaces allow evolution, lighting really enhances the artworks. Warning signs: the child seems less enthusiastic over time or expresses regrets.


